Shopify Flow
From December 31, 2023, Algolia’s Search and Discovery application can’t modify the coding of Shopify themes. For more information, refer to Shopify’s Asset API documentation. As an alternative, Algolia offers Shopify’s App Embed and App Blocks features for Autocomplete and InstantSearch interfaces. For more information, refer to the Quick start and Shopify Algolia configuration documentation.
Shopify Flow is an automation platform for your Shopify store. It has two main parts:
- Triggers are events that start workflows.
- Actions are tasks, such as sending Slack messages or emails.
Algolia triggers for Shopify Flow
The Algolia Search and Discovery app includes these triggers:
- Top searches. Track the most popular searches and the most looked-at results. This trigger is scheduled every day at 1 PM UTC.
- Top searches with no results. Track queries that returned no results. This trigger is scheduled every day at 1 PM UTC.
- Indexing paused. This trigger runs when your Algolia indexing pauses.
Set up workflows with Algolia
The following workflow notifies you via Slack messages and emails about your top searches. For more information, see Creating workflows in Shopify Flow.
Before you begin
- Install the Shopify Flow app.
- Optional: to send Slack messages to channels, install the Flowbot app in your Slack workspace.
Activate the trigger
First, activate the trigger in the Algolia Search and Discovery app.
- In your Shopify admin, go to the Algolia Search and Discovery app.
- Open the Shopify Flow tab.
-
Activate the Top Searches trigger.
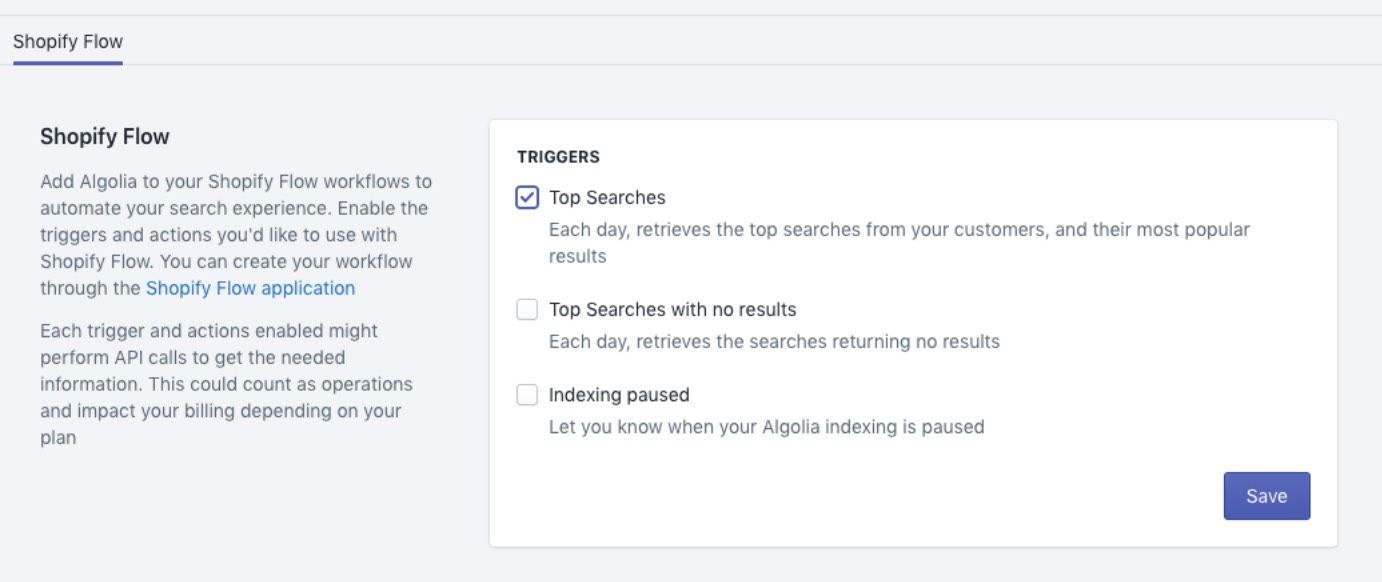
If you skip this step, you can still select the Algolia triggers in Shopify Flow, but no action will be performed unless you activate the trigger in the Algolia Search and Discovery app.
Configure the trigger
After activating the trigger, you can use it in your workflows.
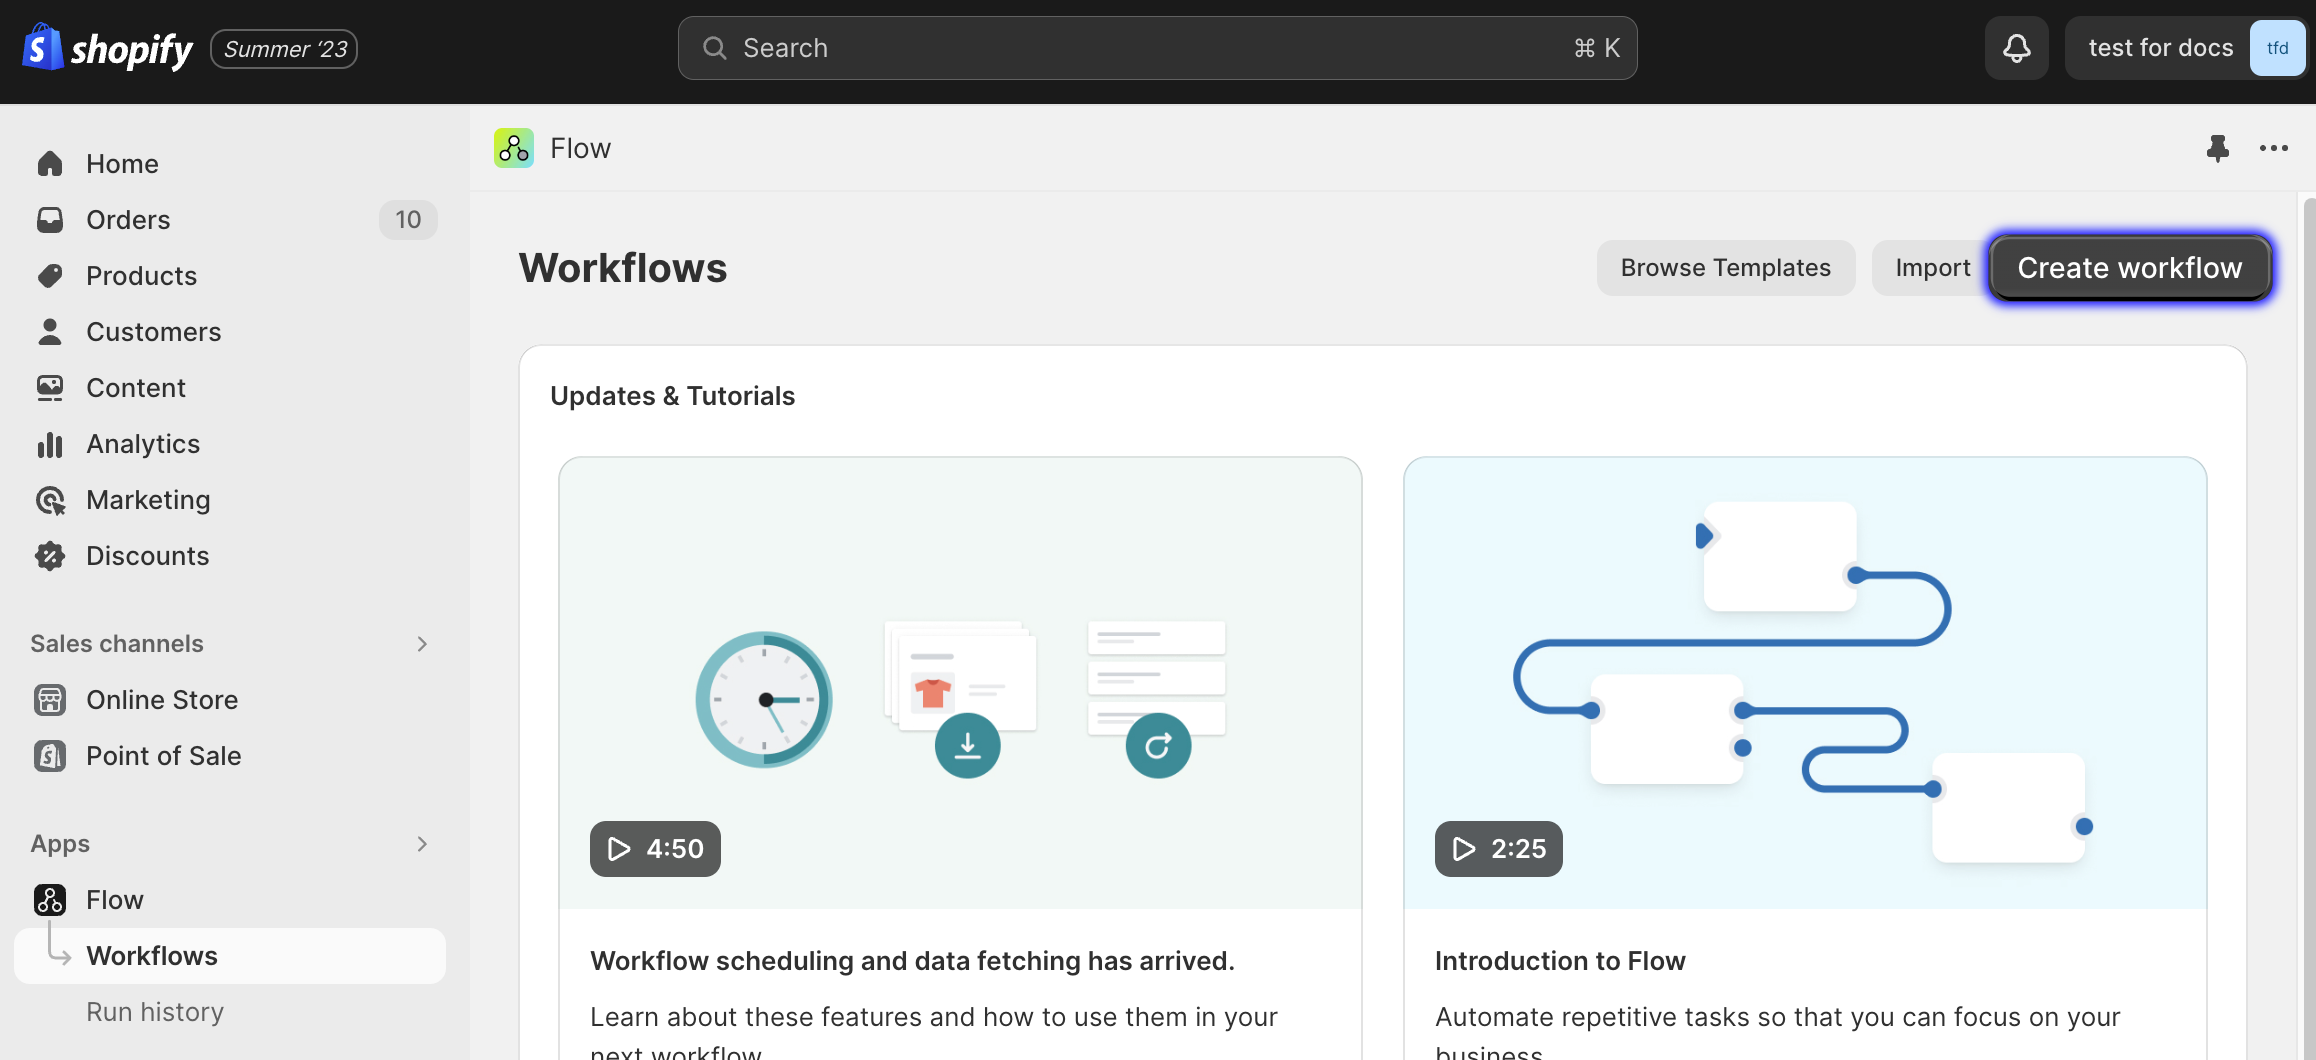
- In your Shopify admin, select Flow in the Apps section of the sidebar.
-
Click Create workflow.
-
Click Select trigger, find the Algolia Search and Discovery app, and select the Top Searches trigger.
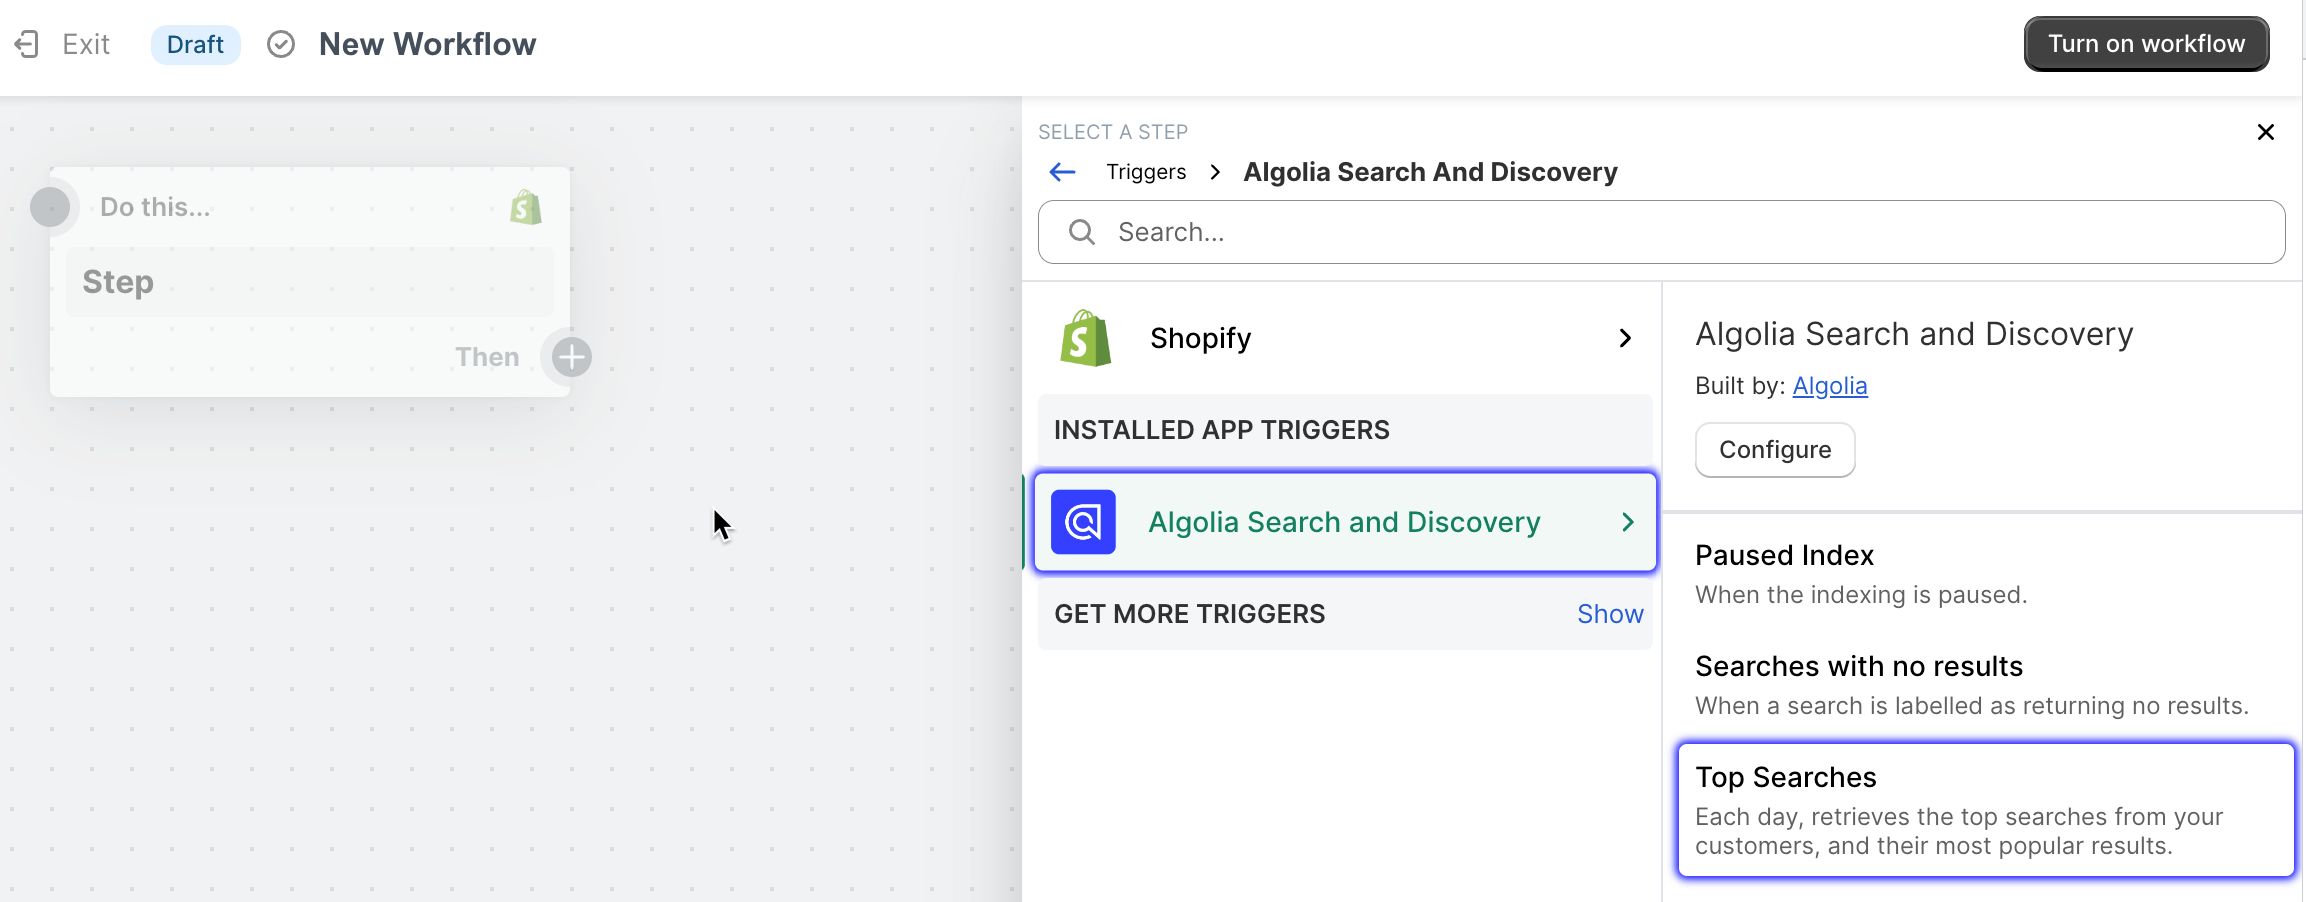
If you didn’t activate the trigger yet, you can set up the workflow, but you won’t receive any notifications.
Configure action: send Slack messages
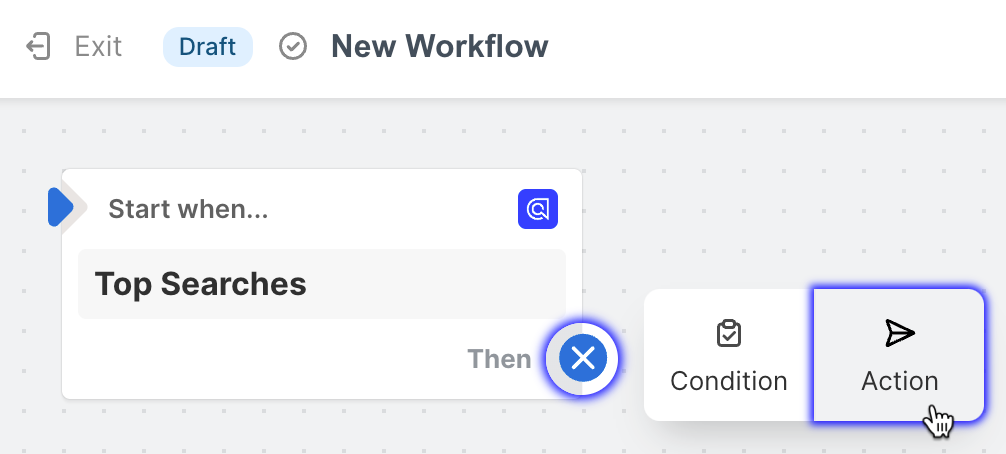
When the trigger event is fired, you can perform one or more actions, such as, sending a Slack message.
-
In the Shopify Flow app, click Add action.
- Find the Slack app.
-
If it’s your first time using the Slack action in Shopify, click Connect.

-
Select the Send Slack message action.

-
Enter the details for your Slack message:
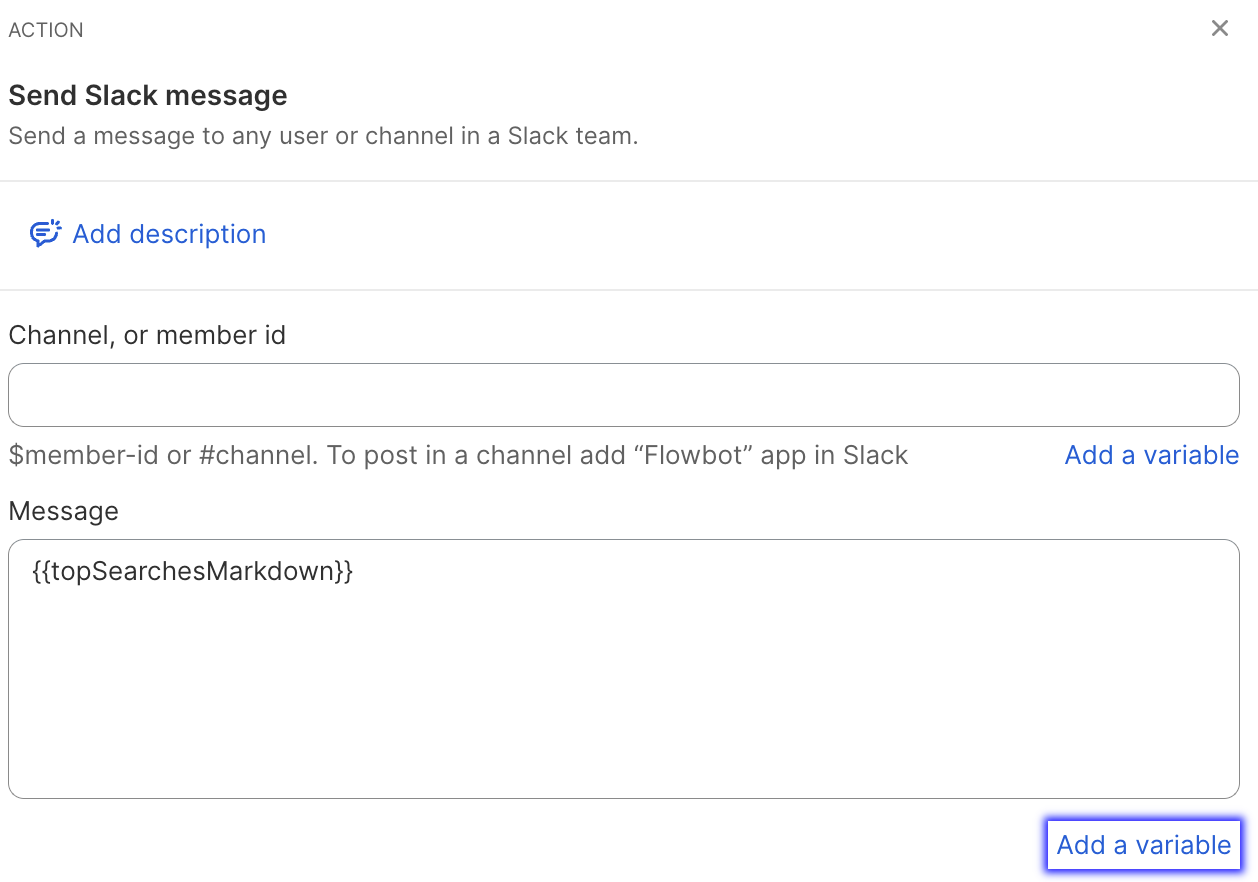
- Optional: add a description for this Slack notification.
-
Select a Slack member ID or enter a channel name which should receive the Slack message.
To find your Slack member ID, visit your profile, click the icon and select Copy member ID.
- Under the Message field, click Add a variable and select the
topSearchesMarkdownvariable. When the Slack message is sent, this variable will be replaced with the message body.
-
Click Turn on workflow.
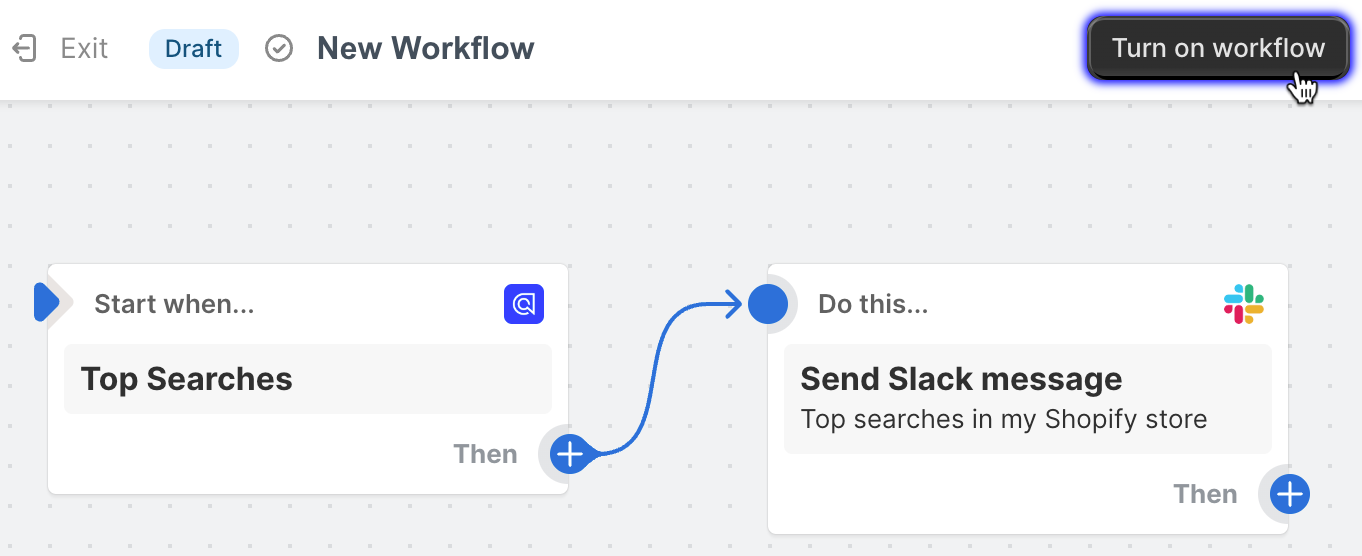
Now, you’ll receive a Slack message every day at 1 PM UTC with your top searches.
Configure action: send emails
-
In the Shopify Flow app, select your workflow and add another action.

-
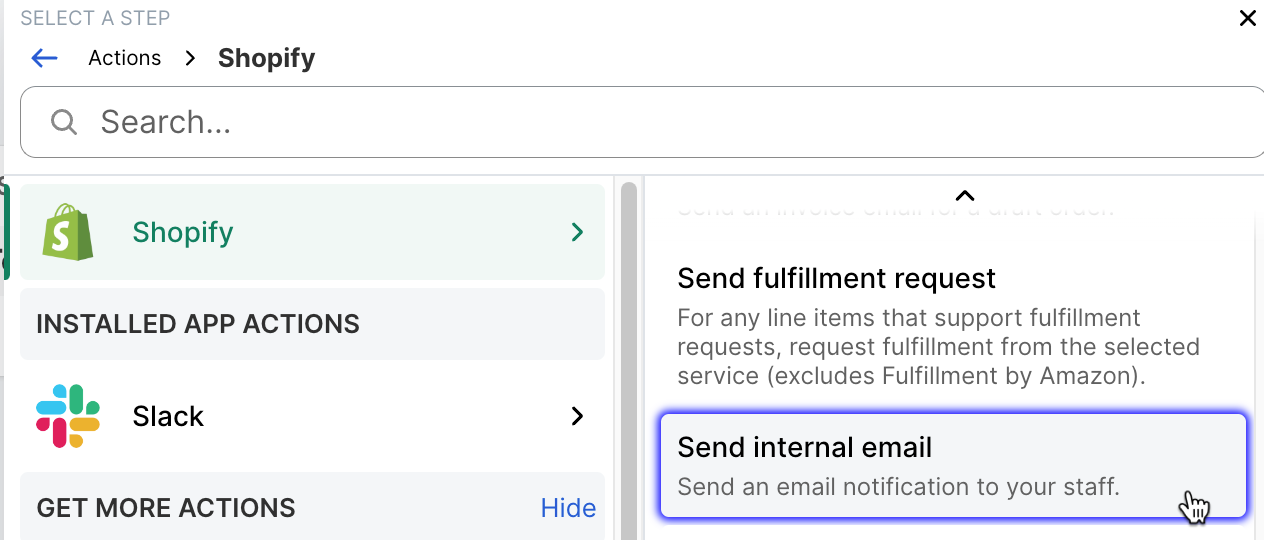
From the Shopify app, select the Send internal email action.
-
Enter the details for your email.
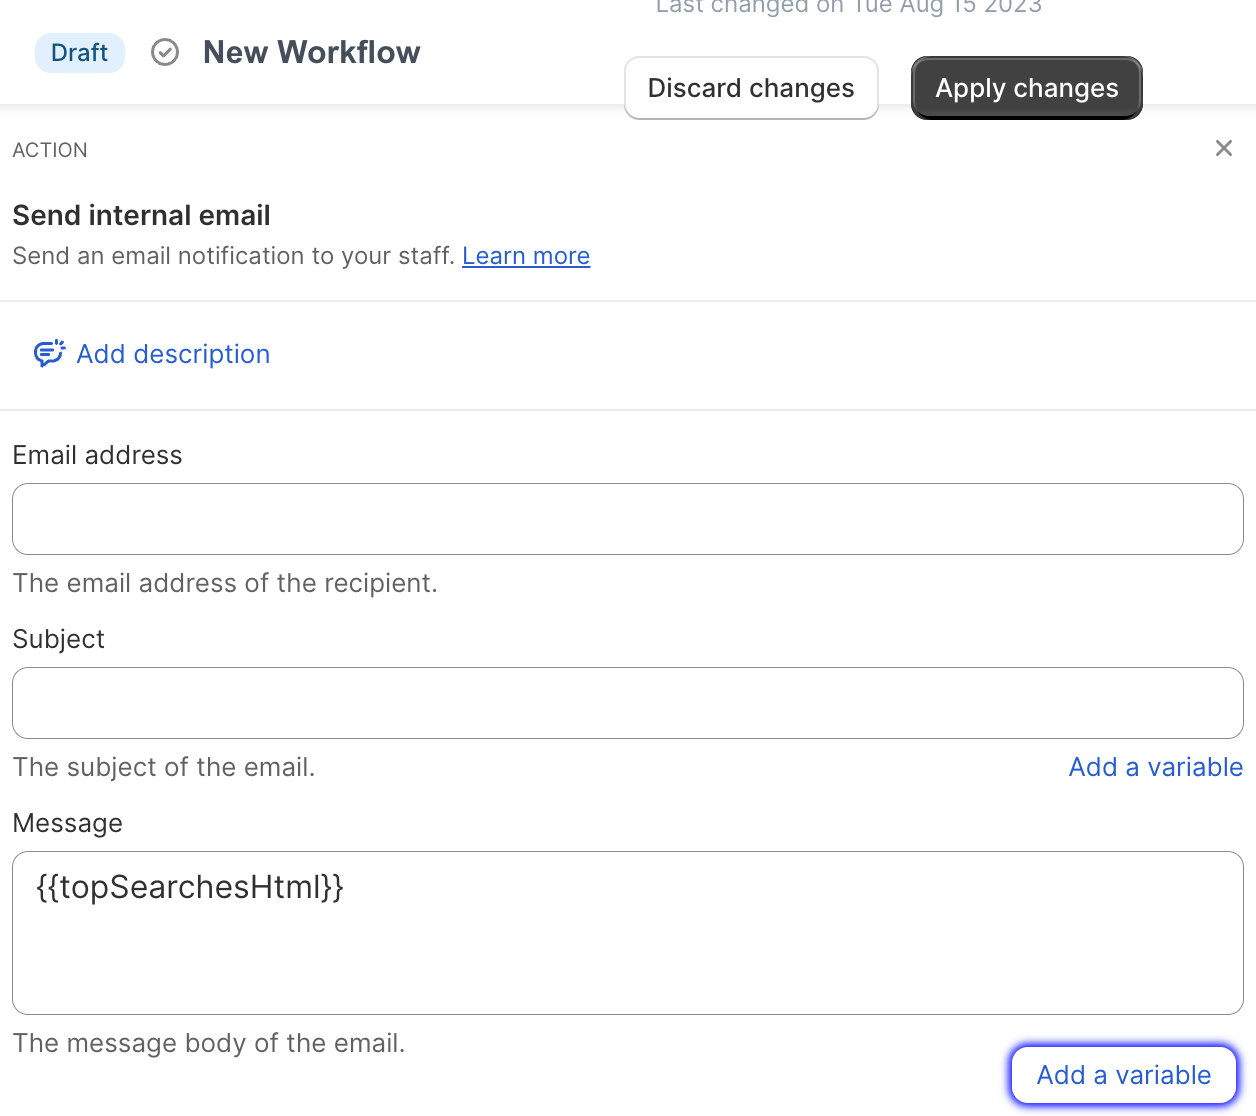
- Optional: add a description for this email notification.
- Enter one or more email addresses and a subject.
- Under the Message field, click Add a variable and select the
topSearchesHtmlvariable. When the email is sent, this variable will be replaced with the email body.
-
Click Apply Changes.
Now, in addition to a Slack message, you’ll receive an email with your top searches.
