Linking Adobe Analytics
You can use your website’s Adobe Analytics data to enrich the Algolia records extracted from your site. This means you can boost search results based on their popularity (or another metric tracked by Adobe Analytics), you can improve the relevance of your website’s search.
With a little bit of configuration, your crawler can automatically fetch Adobe Analytics metrics.
Here’s a brief overview of the required steps:
- Add developers and enable the correct permissions in Adobe Admin Console.
- Generate a service account on Adobe Developer Console.
- Set up the analytics data
- Create a new external data source in the Crawler Admin Console.
- Edit your crawler’s
recordExtractorso that it integrates the metrics retrieved from Adobe Analytics into the output records.
Set up Adobe Analytics access
Get your company ID and report suite ID
To access your Adobe Analytics data, the crawler needs your company ID and a report suite to get data from.
To get your company ID:
- Go to your Adobe Analytics interface
- Navigate to Admin > All Admin > Company settings home > API Access. Your company ID is in the first paragraph.
To create a report suite: Refer to Adobe’s documentation. You can find your report suite ID in Admin > Report suites.
Add developers to your product profile
To set up the connection between the Algolia crawler and Adobe Analytics, you need developer permissions.
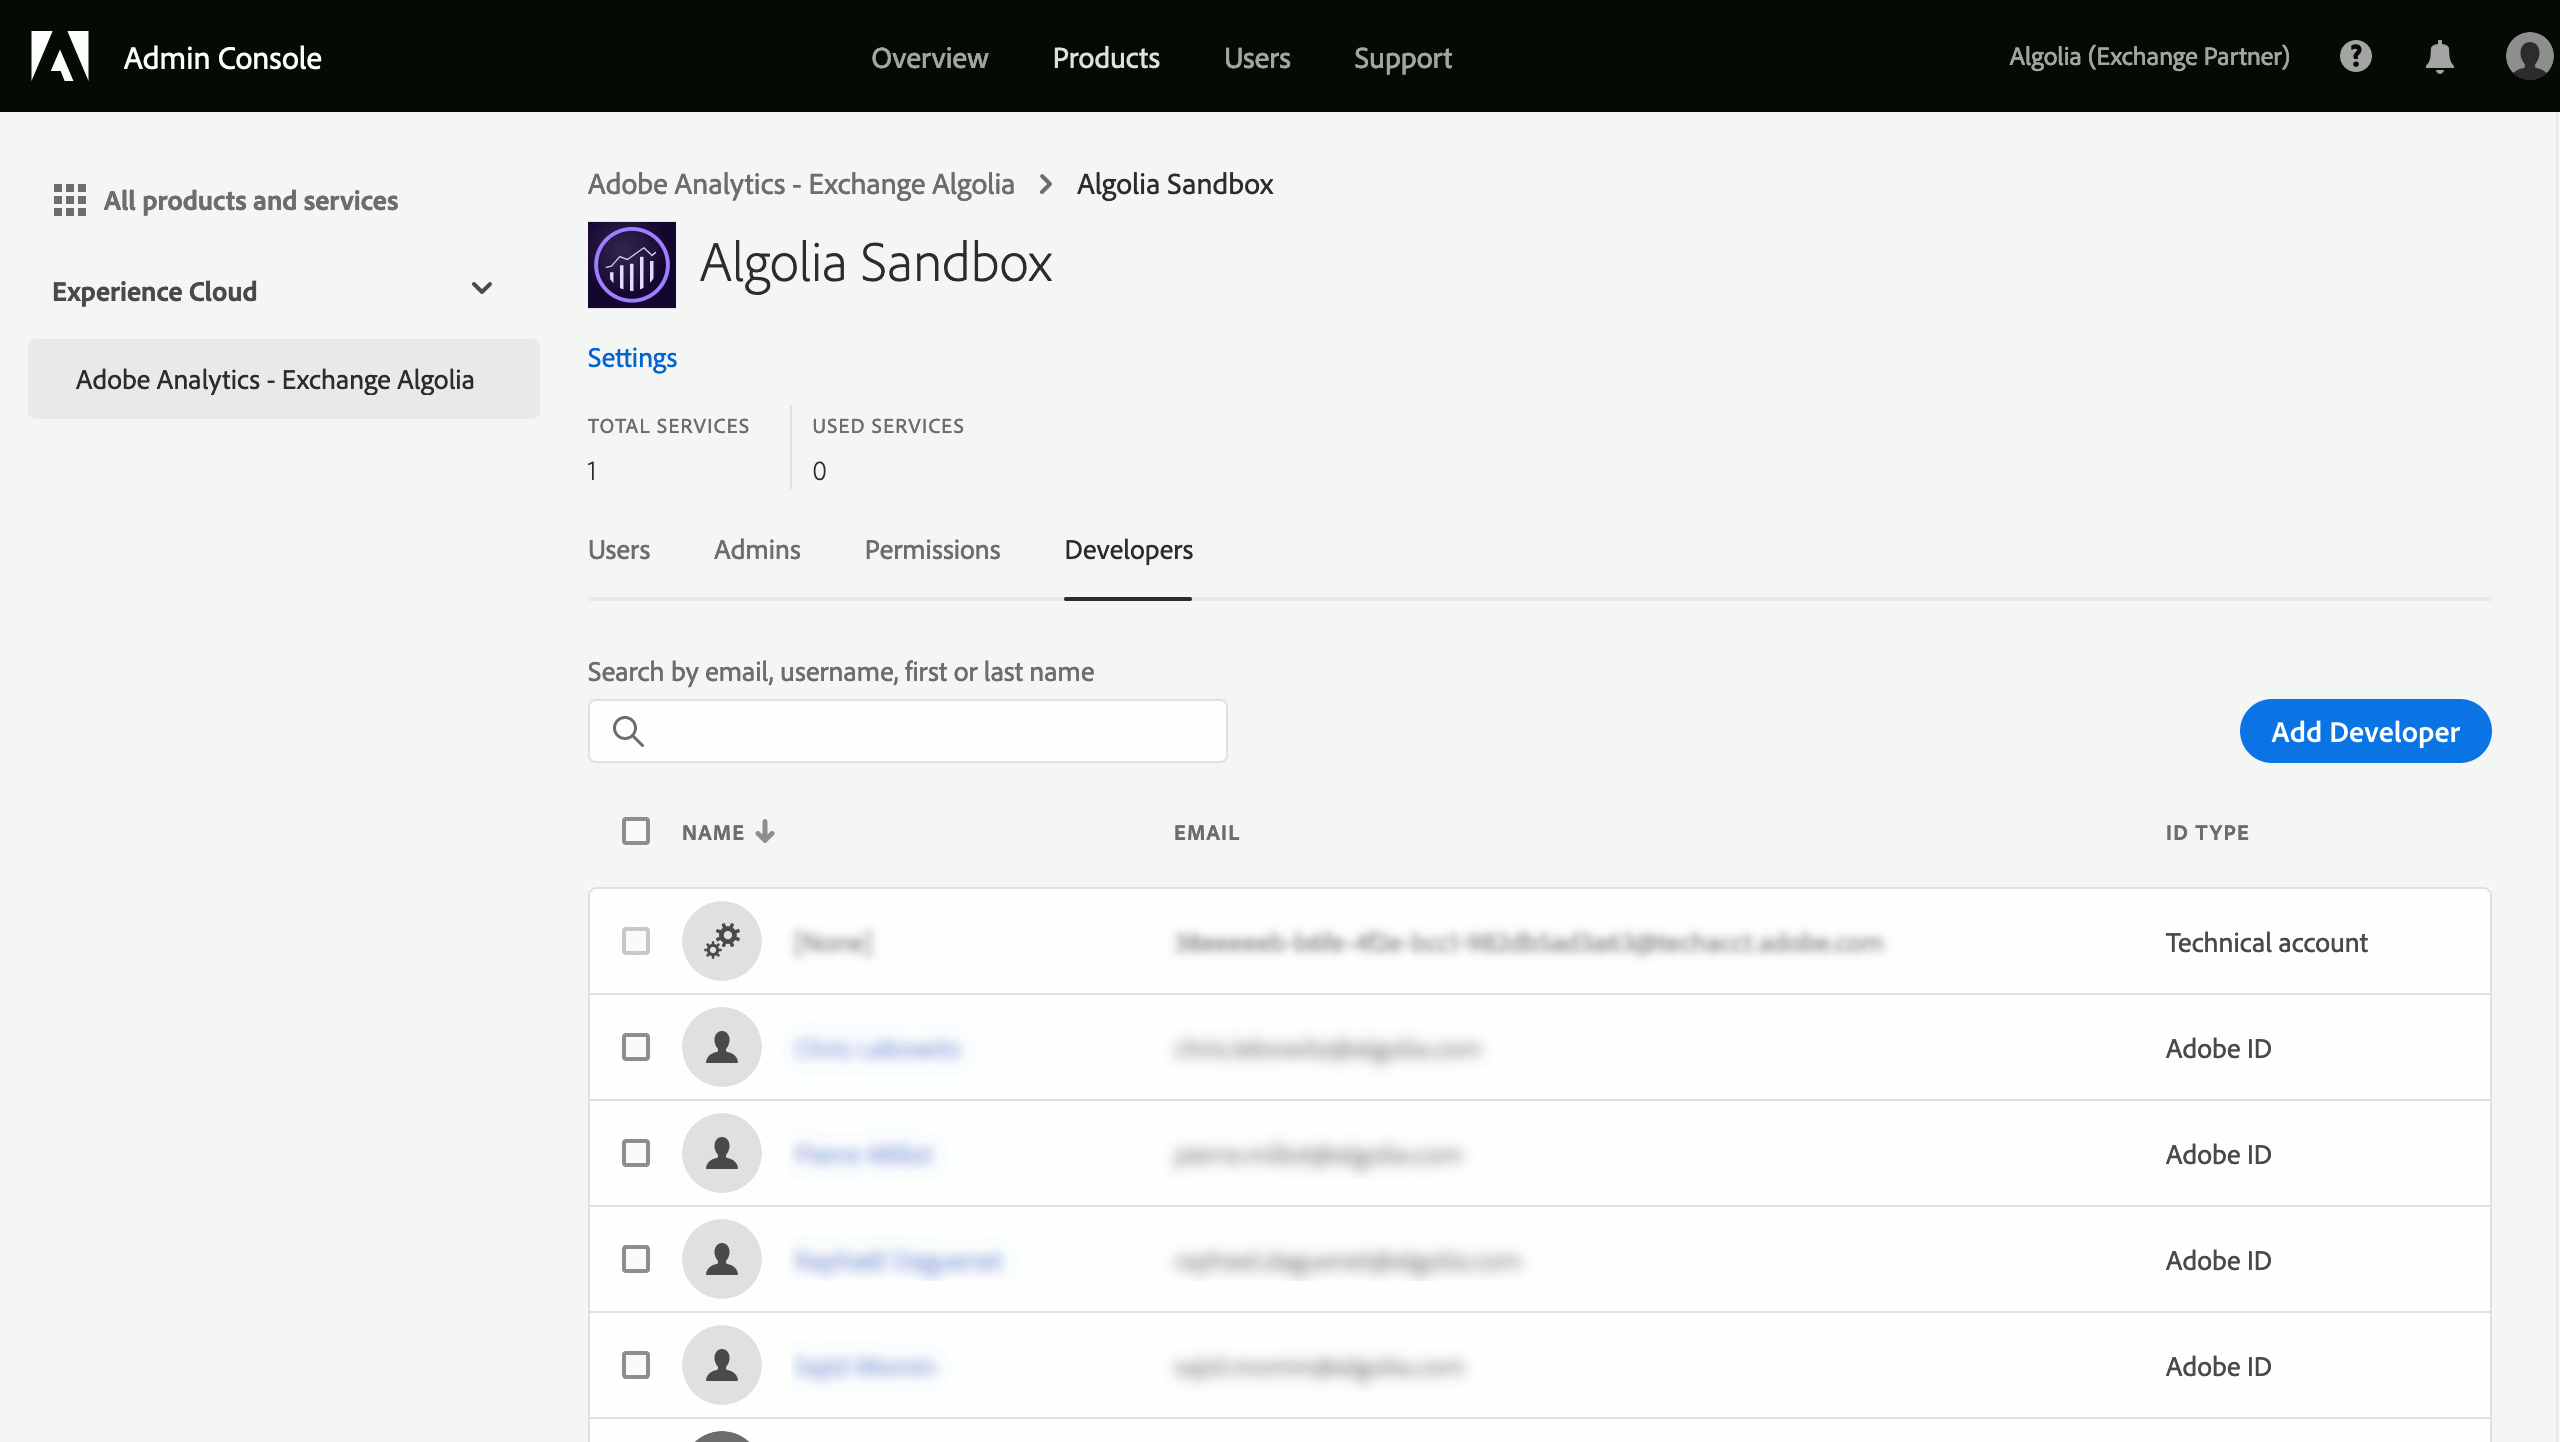
- Go to Adobe Admin Console and select Adobe Analytics in the Products list.
- Select or create a Product Profile and click the Developers tab.
- Click Add Developer.

For more information about developer management, read Adobe’s documentation.
Grant permissions for the report suite
Still in you Product Profile of the Adobe Admin Console:
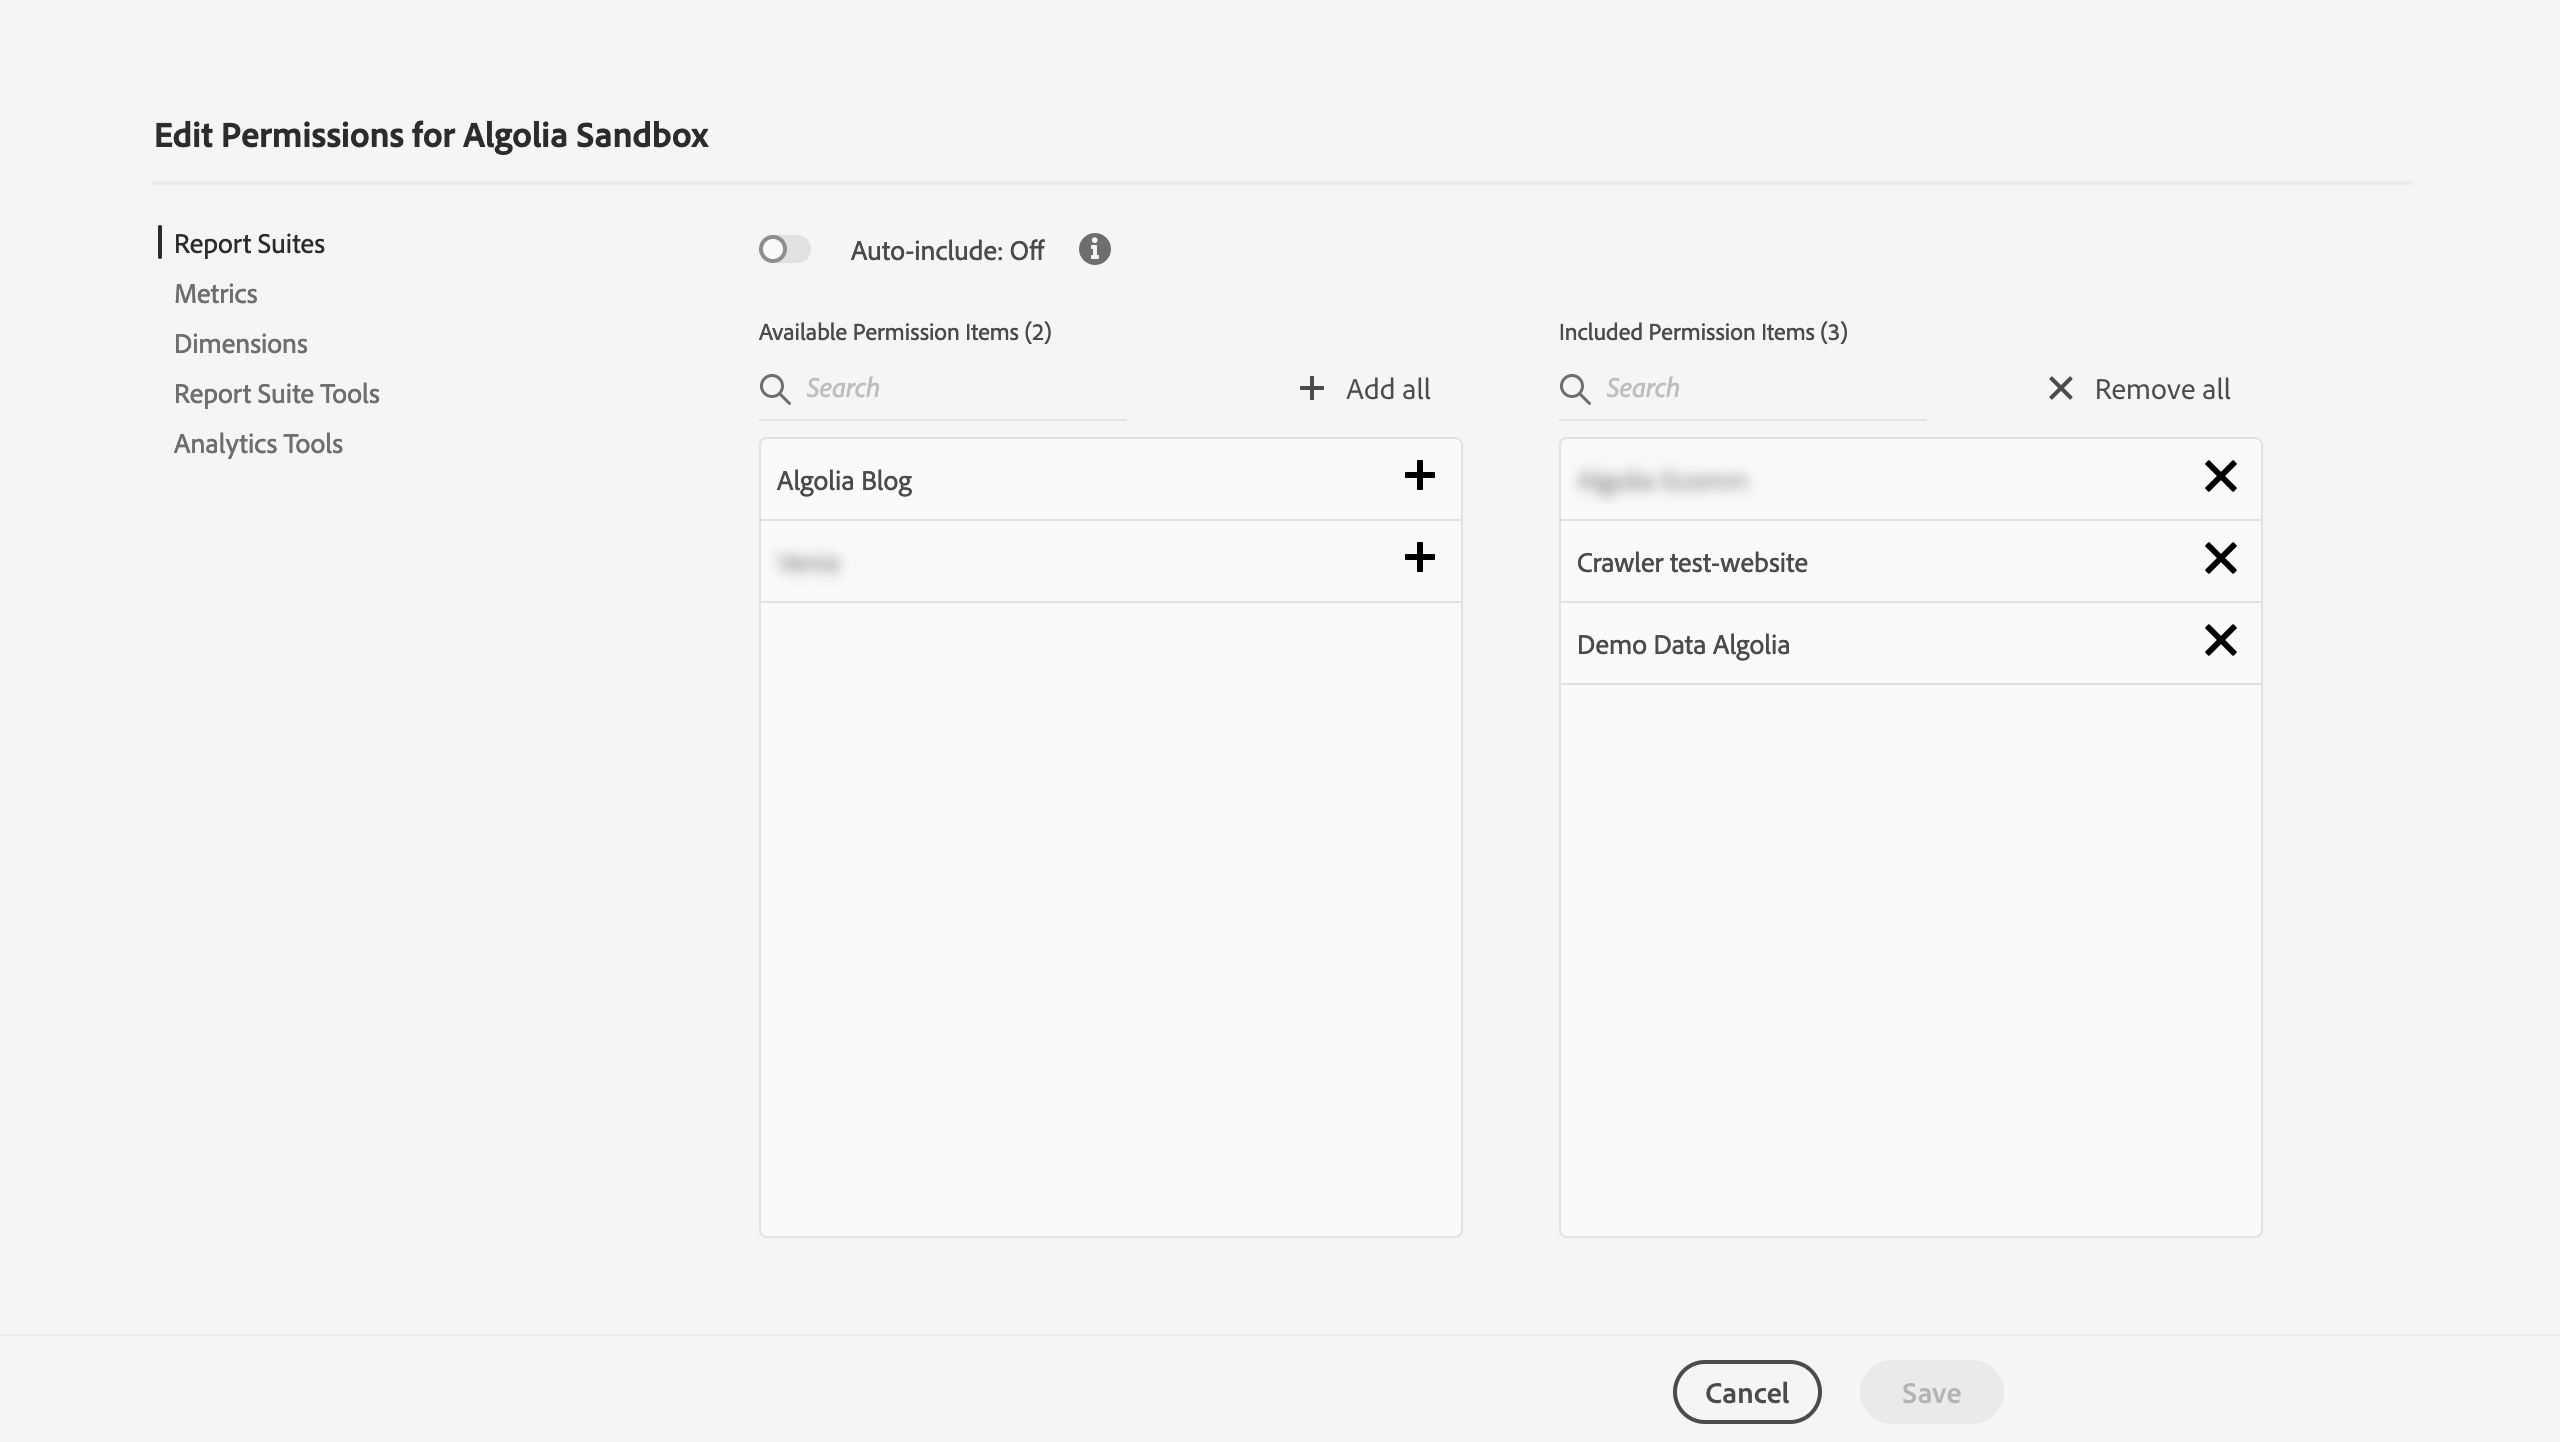
- Go to the Permissions tab.
- Click Report Suites and add your report suite to the Included Permission Items.
- Do the same for the Metrics and Dimensions you want to use with the crawler.

Create a service account
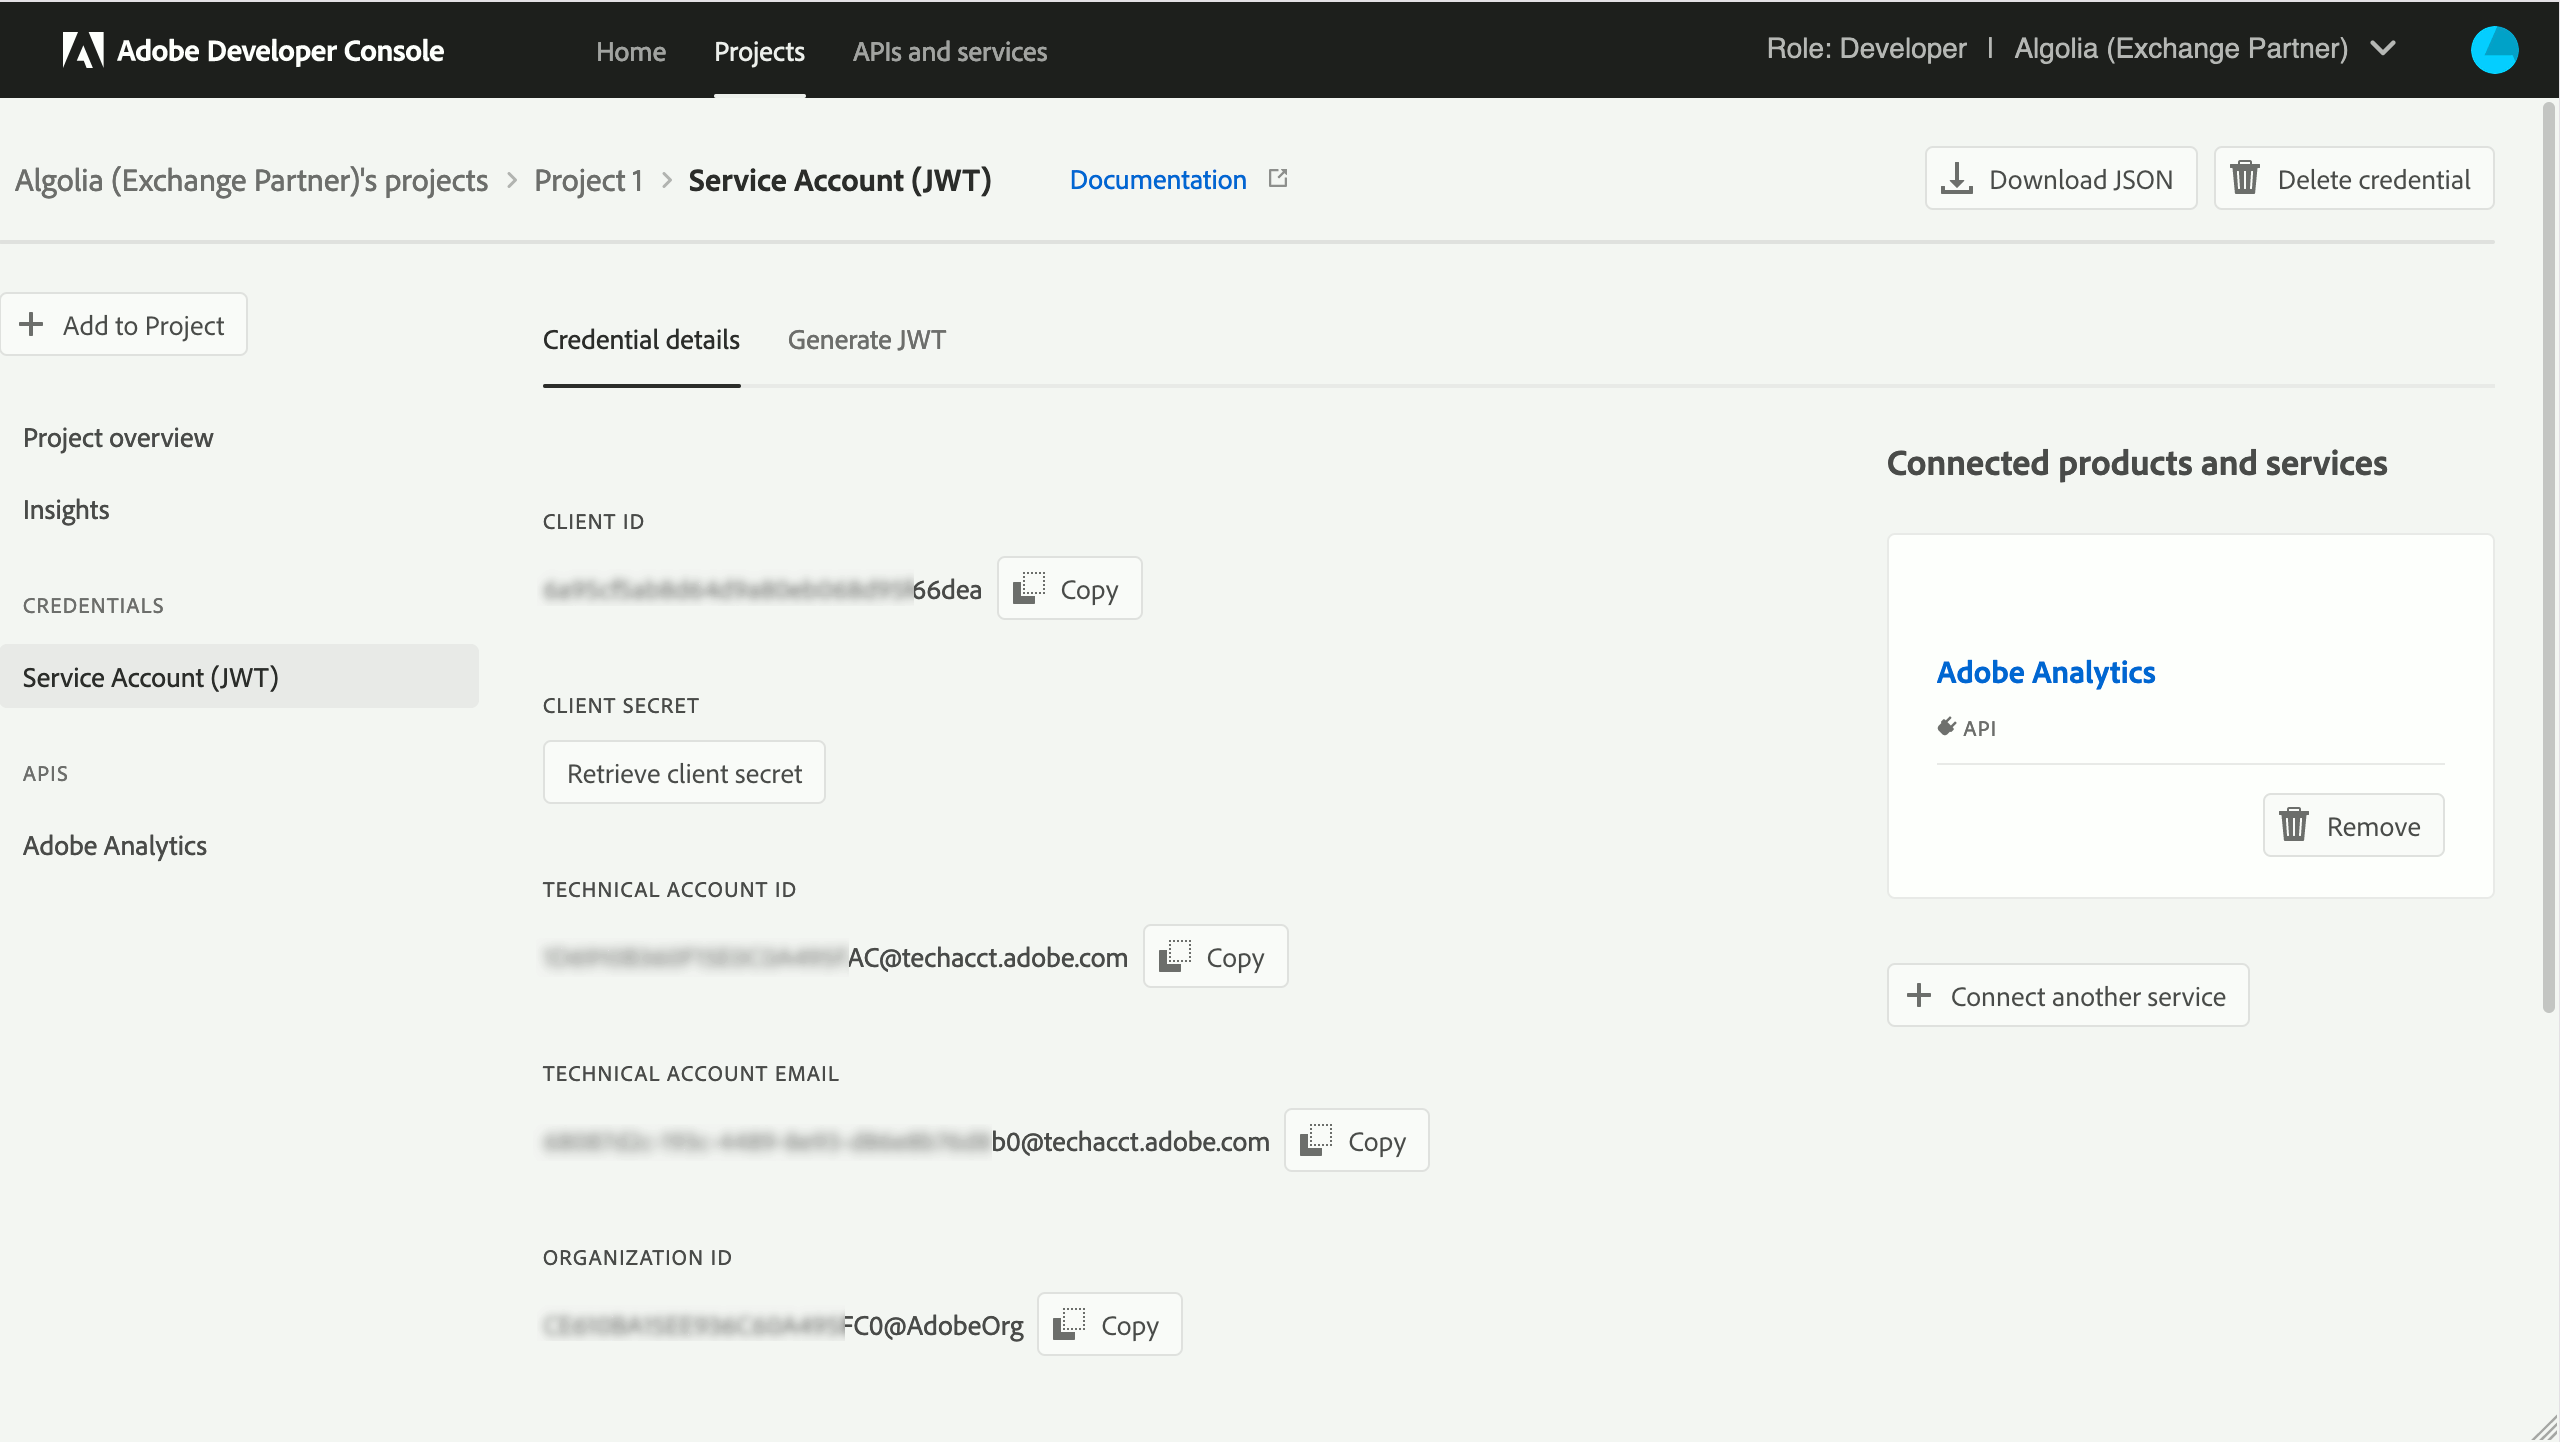
- Go to Adobe Developer Console and login with the developer account added before.
- In the Projects tab, click on Create new project or use an existing one.
- In the project, click on + Add to Project > API, select the Adobe Analytics API and click Next.
- When asked for the type of authentication, select Service Account (JWT). Complete setup by generating a key-pair or importing your own. If you choose to generate a key-pair, don’t forget to save the private key as you will need it later.
You now have a Service Account (JWT) section in the project with the needed credentials.

Push page URLs into an eVar
To map analytics data to each visited URL, the crawler groups the data using Adobe’s Page dimension. By default this dimension collects data from the pageName variable, and fallback to the pageURL variable (The pageURL dimension isn’t available in Adobe Analysis Workspace).
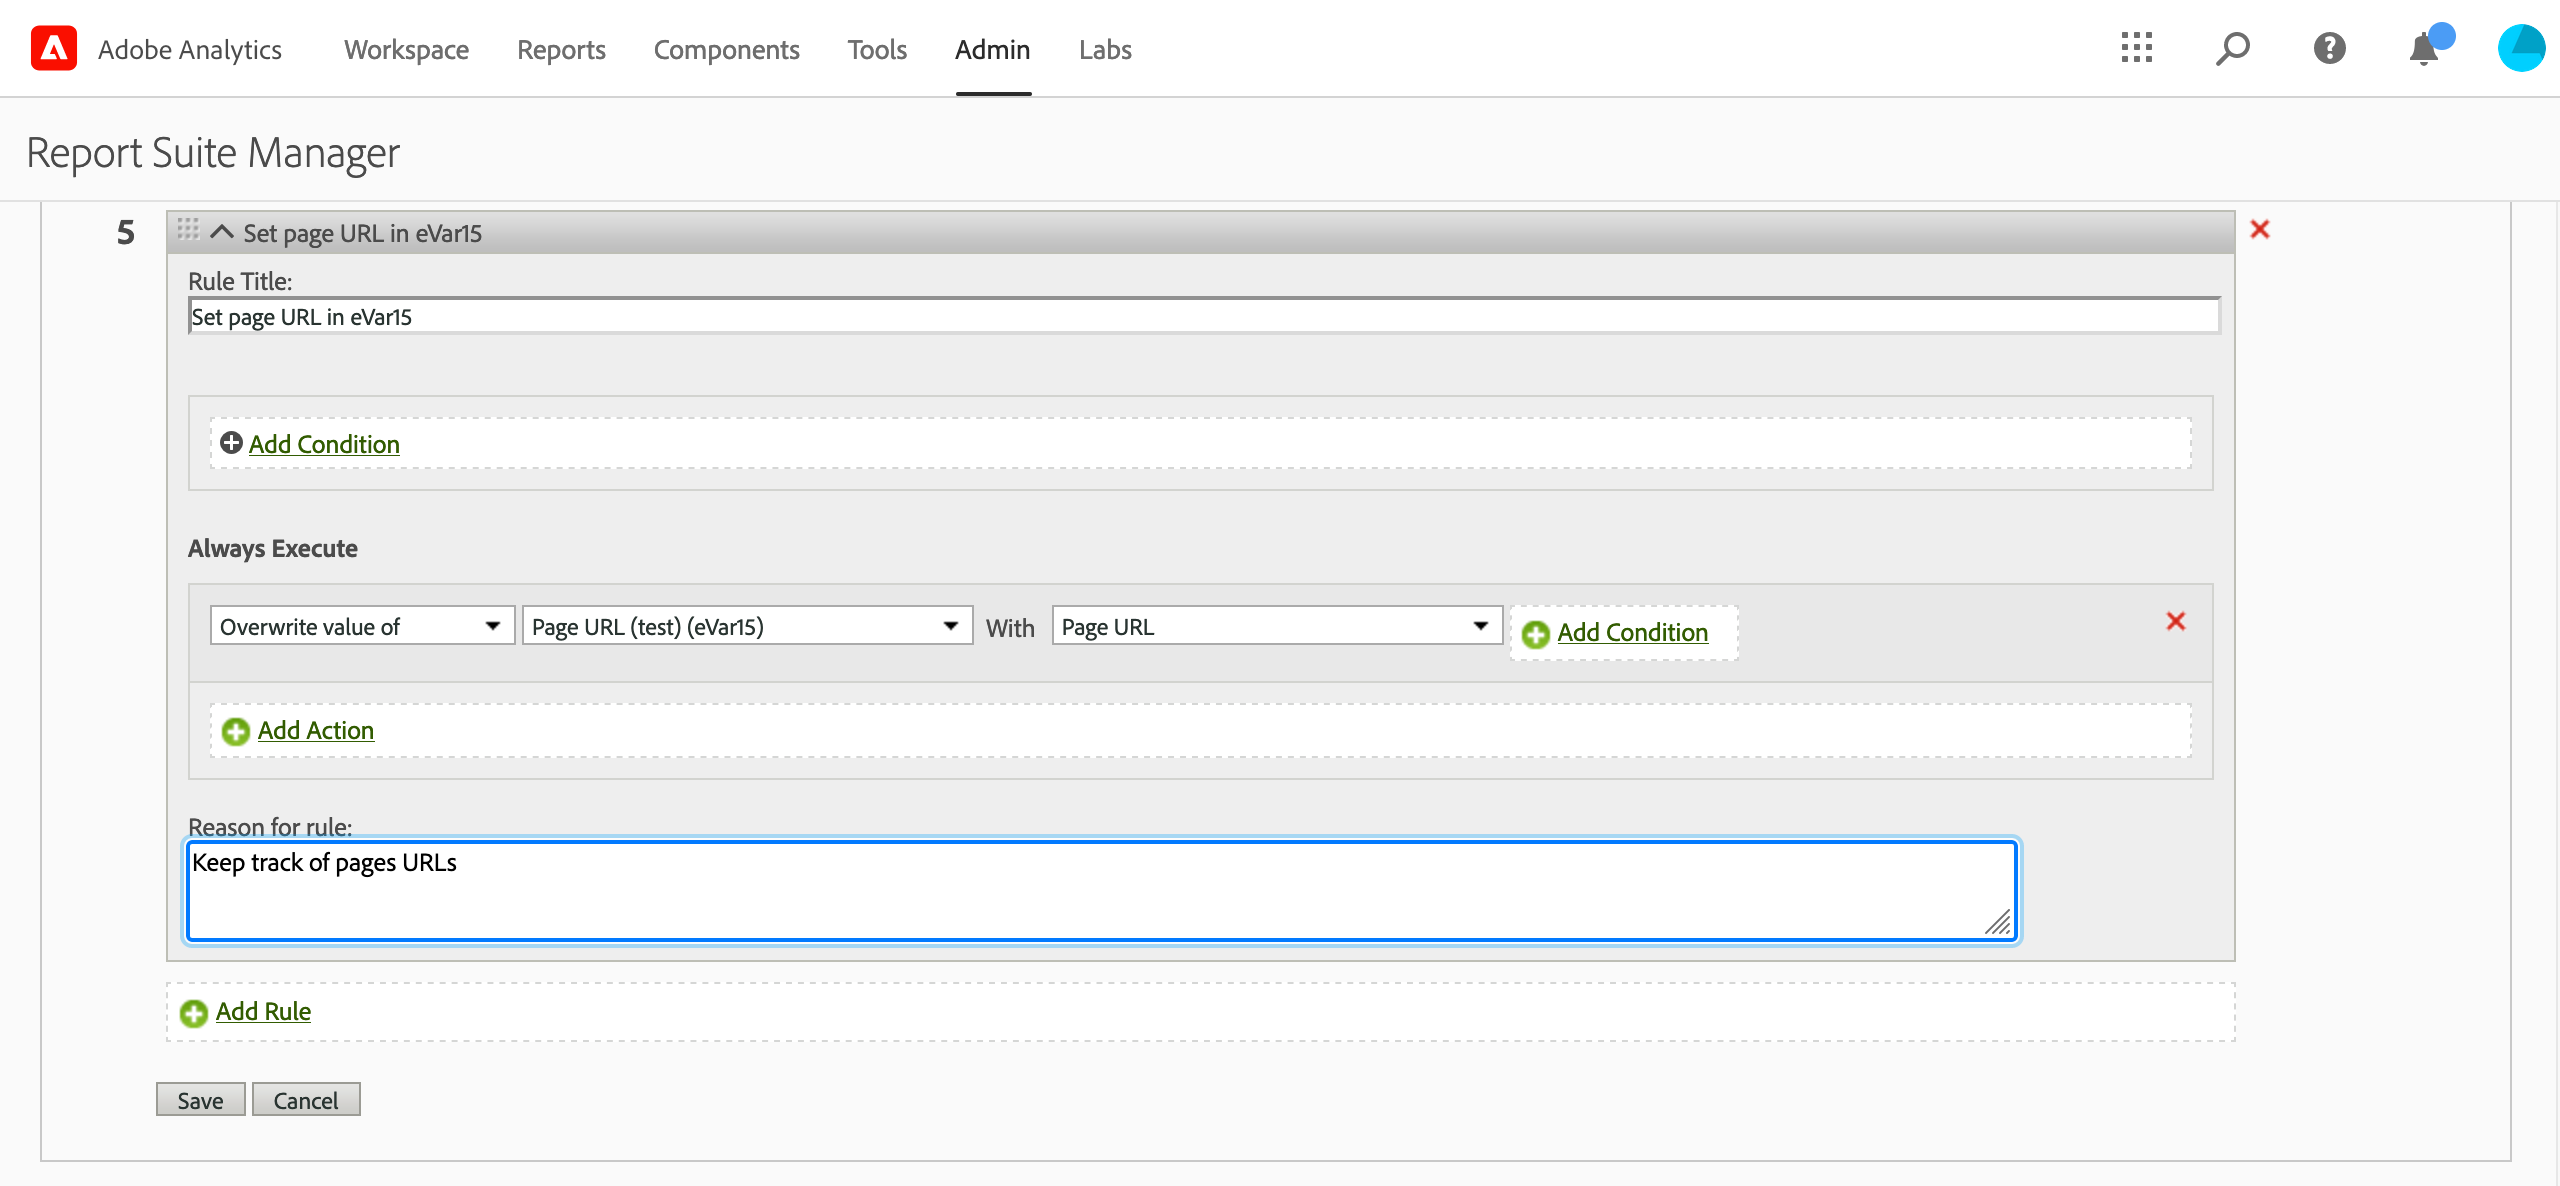
If your pages are named, to ensure that page URLs can be populated reliably, you must create an eVar and push the page URLs into it:
- Enable a new eVar

- Use a processing rule to copy the page URL into the eVar

Link the crawler to your Adobe Analytics account
Add a new External Data source
- Go to the External Data tab of the Crawler Admin Console home page
- Click on + New External Data Source
- Select the Algolia App for which the data will be available, and give it a unique ID
- Select
Adobe Analyticsas the external data type - Fill all the fields:
- General information: your company ID and report suite ID
- Service Account credentials: this section expects the credentials obtained when you created your service account
- Reports data: in this section, you must select one or more metrics, and the dimension that stores your page URLs (example:
variables/evar15)
Add the data source in your crawler configuration
In this step, edit the configuration of your crawler to use the External Data you just created.
- Open one of your crawlers and click on the Editor tab.
- Add the unique name of the External Data to your
externalDataproperty:
externalData: ['myAdobeAnalyticsData']
- Save your changes.
After saving your crawler’s configuration, your Adobe Analytics metrics will be ready whenever you crawl your website. If an error occurs while fetching your analytics, it should be reported in less than one minute after the crawling process starts.
Integrate analytics into records
In this step, you edit your recordExtractor so that it integrates metrics from Adobe Analytics into the records it produces.
- Go to your Crawler Admin, select your crawler, and go to the Editor tab.
-
Read metric values from the external data source added before, and store them as attributes for your resulting record(s). If the current page has data in Adobe Analytics, the associated metrics are present in the
dataSourcesparameter of yourrecordExtractor:Copy1 2 3 4 5 6 7 8 9 10
recordExtractor: ({ url, dataSources }) => { // 'myAdobeAnalyticsData' must match one of the unique name defined in 'externalData' const pageviews = dataSources.myAdobeAnalyticsData['metrics/pageviews']; return [ { objectID: url.href, pageviews, }, ]; },
- In the Test a URL field of the configuration editor, type the URL of one of your pages that has analytics attached to it.
- Click on Run test.
- When the test completes, click the External data tab. You should see the analytics data extracted from Adobe Analytics for that page.
If this doesn’t work as expected, try adding a trailing / to your URL, or test with another URL.
